Android Volley 基本使用
Android Volley 基本使用
本篇主要介绍 Google 给Android 平台提供的 Volley 一个 Http请求库 , 齐射!
1.概述
Volley是Google 提供的一个小巧的异步请求库,扩展很强支持okhttp,(默认是 Android2.3 及以上基于 HttpURLConnection,2.3 以下基于 HttpClient 实现), Volley 英文齐射的意思 就是指无数急促的请求,适合数据量小,并且通信频繁的场景
官方文档 https://google.github.io/volley/

2.准备工作
想通过 volley 调用一个我自己的博客文章接口 然后展示标题 和 短描述 到 页面上
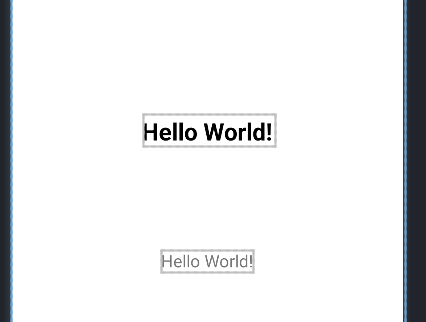
2.1 编写布局文件
上面展示标题 下面展示 短描述

<?xml version="1.0" encoding="utf-8"?>
<androidx.constraintlayout.widget.ConstraintLayout xmlns:android="http://schemas.android.com/apk/res/android"
    xmlns:app="http://schemas.android.com/apk/res-auto"
    xmlns:tools="http://schemas.android.com/tools"
    android:layout_width="match_parent"
    android:layout_height="match_parent"
    tools:context=".MainActivity">

    <TextView
        android:id="@+id/showTitle"
        android:layout_width="wrap_content"
        android:layout_height="wrap_content"
        android:text="Hello World!"
        android:textStyle="bold"
        android:textSize="25sp"
        android:textColor="@color/black"
        app:layout_constraintBottom_toBottomOf="parent"
        app:layout_constraintEnd_toEndOf="parent"
        app:layout_constraintStart_toStartOf="parent"
        app:layout_constraintTop_toTopOf="parent"
        app:layout_constraintVertical_bias="0.2" />

    <TextView
        android:id="@+id/showShortDesc"
        android:layout_width="wrap_content"
        android:layout_height="wrap_content"
        android:text="Hello World!"
        android:textSize="18sp"
        app:layout_constraintBottom_toBottomOf="parent"
        app:layout_constraintEnd_toEndOf="parent"
        app:layout_constraintStart_toStartOf="parent"
        app:layout_constraintTop_toBottomOf="@+id/showTitle"
        app:layout_constraintVertical_bias="0.2" />


</androidx.constraintlayout.widget.ConstraintLayout>
2.2 提供博客接口地址
#随便找了我的一篇博客的 请求地址
https://www.askajohnny.com/blogs/blogInfo/303/15
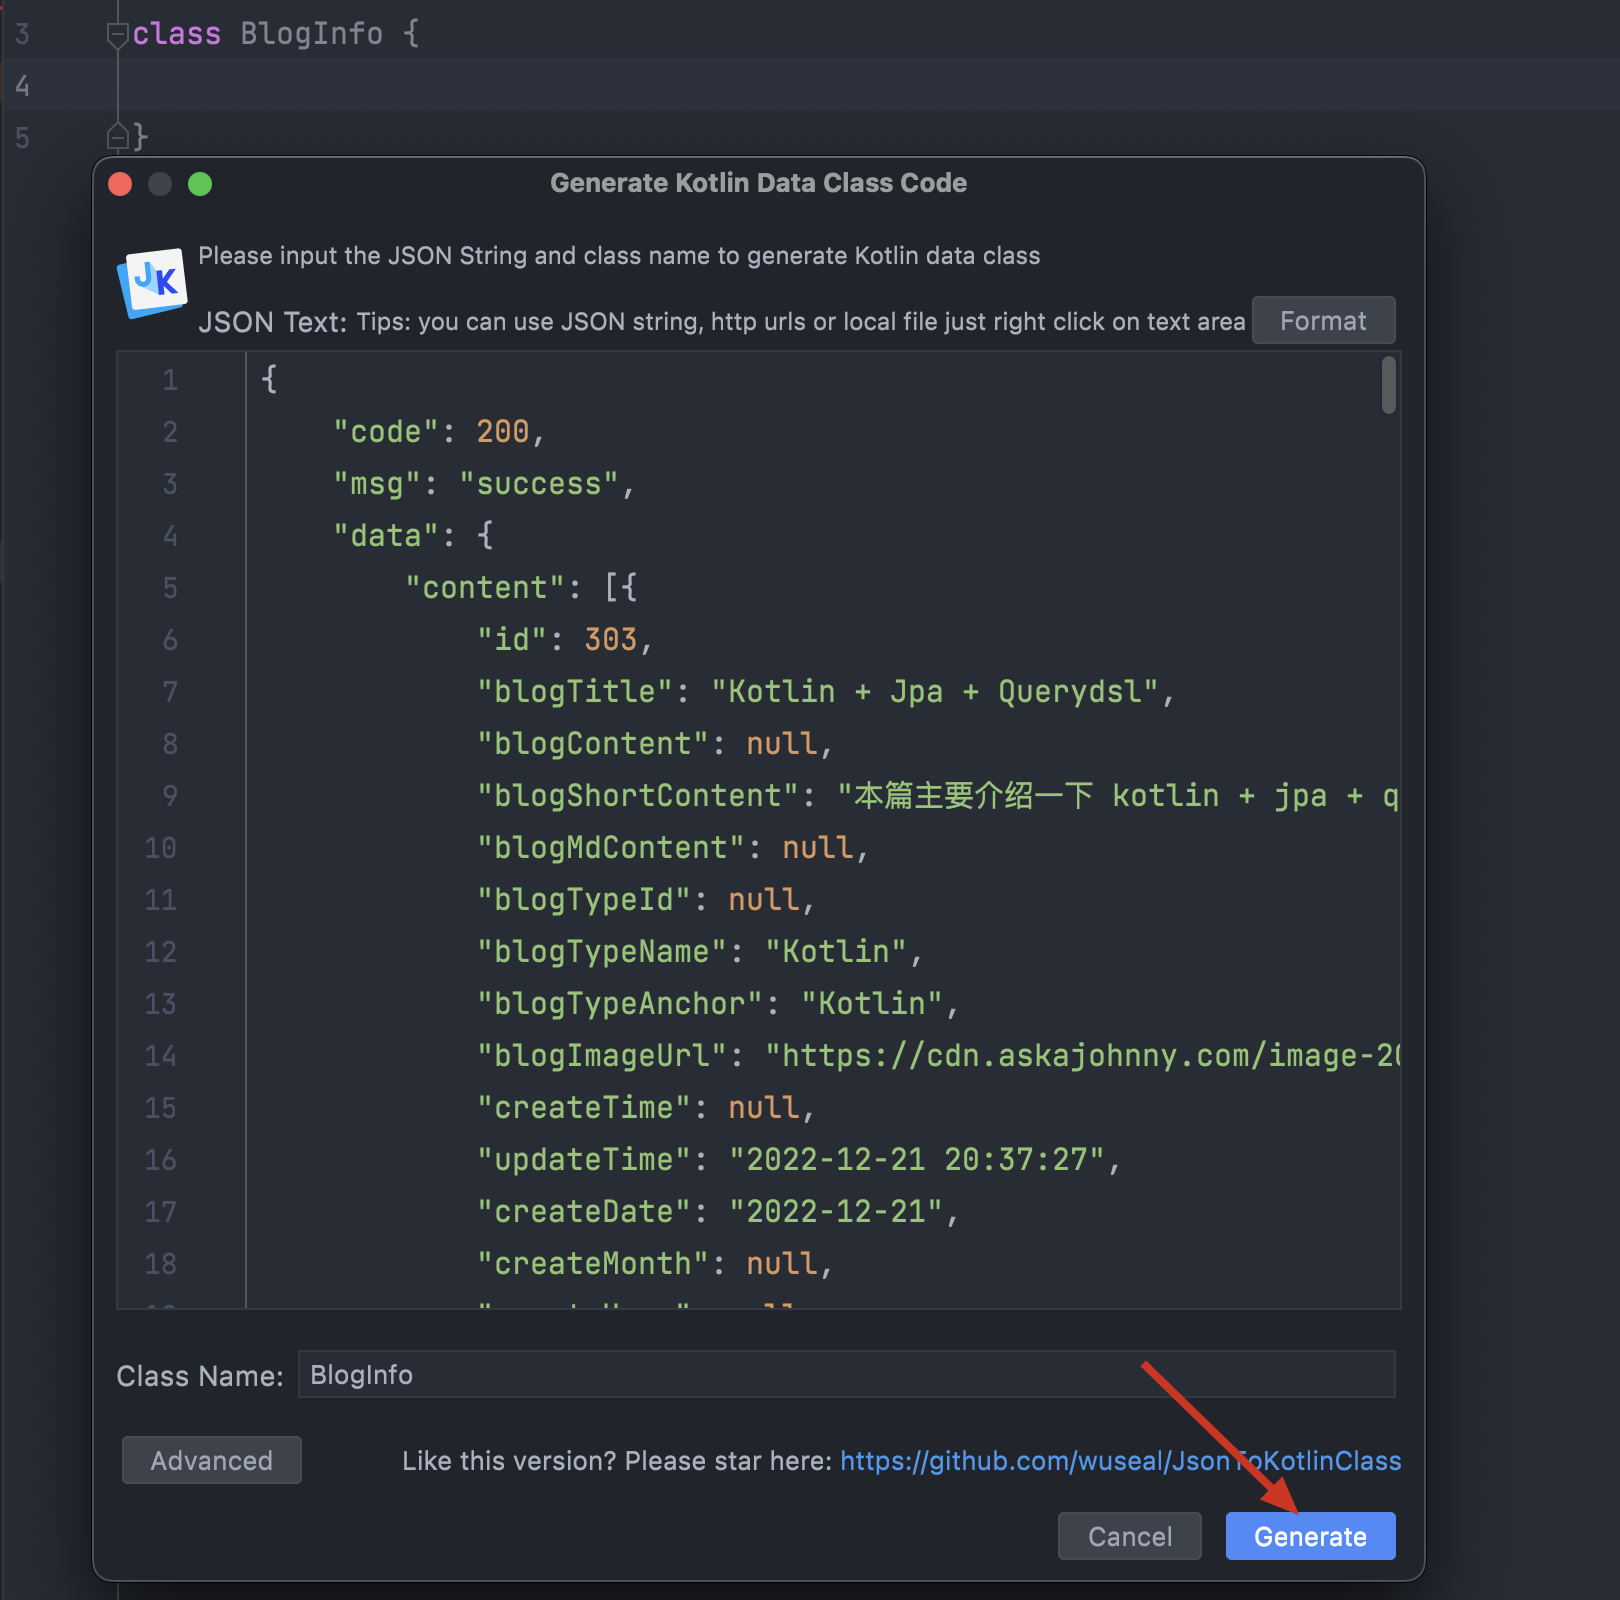
2.3 通过JSON To Kotlin Class 插件生成 data class (kotlin)
和 IDEA 中 Json Formatter插件类似,它是生成JAVA的, 而这个 JSON To Kotlin Class 插件是用来生成kotlin 的数据类的
右击文件 Generate.. 或者 control + 回车 唤起转化窗口

package com.johnny.volleydemo

data class BlogInfo(
    val code: Int,
    val `data`: Data,
    val msg: String
)

data class Data(
    val anchors: List<Anchor>,
    val blogContent: String,
    val blogImageUrl: String,
    val blogMdContent: String,
    val blogShortContent: String,
    val blogTitle: String,
    val blogTypeAnchor: Any,
    val blogTypeId: String,
    val blogTypeName: Any,
    val clickCount: Int,
    val createDate: String,
    val createMonth: Any,
    val createTime: String,
    val createUser: Any,
    val id: Int,
    val isThumbed: String,
    val nextBlogId: Any,
    val nextBlogTitle: Any,
    val previousBlogId: Any,
    val previousBlogTitle: Any,
    val thumbCount: Int,
    val updateTime: String
)

data class Anchor(
    val anchorId: String,
    val anchorName: String
)
3.引入依赖
根据你的dsl 语言 选择适合的方式引入依赖
Groovy
dependencies {
    implementation "com.android.volley:volley:1.2.1"
}
Kotlin
dependencies {
    implementation("com.android.volley:volley:1.2.1")
}
4.发送请求
使用 volley 需要先构建一个请求, 并且把请求提交到 newRequestQueue 队列中, 提交后 volley 会根据构建的请求异步发送请求, 只需要在回调的地方处理请求的响应即可
4.1 StringRequest 构建请求
volley 提供了 StringRequest 构建请求
    override fun onCreate(savedInstanceState: Bundle?) {
        super.onCreate(savedInstanceState)
        setContentView(R.layout.activity_main)

        val titleTextView = findViewById<TextView>(R.id.showTitle)
        val shortDescTextView = findViewById<TextView>(R.id.showShortDesc)

        //使用 volley需要创建一个Queue
        val requestQueue = Volley.newRequestQueue(this)
        //请求的 博客 url
        val url =
            "https://www.askajohnny.com/blogs/blogInfo/303/15"
        //构建StringRequest请求
        val stringRequest = StringRequest(Request.Method.GET,
            url, {
                //由于我后端没有在header 的 charset中返回 UTF-8 所以默认当做ISO-8859-1格式
                //所以这里需要先转化成 UTF-8
                val data = String(
                    it.toByteArray(Charsets.ISO_8859_1),
                    Charsets.UTF_8
                )
                Log.d(TAG, "onCreate: stringRequest  ${data}")
                //通过Gson转化 成上面生成的 数据类
                val blogInfo = Gson().fromJson(data, BlogInfo::class.java)
                //把后端返回的数据 展示在 textview上
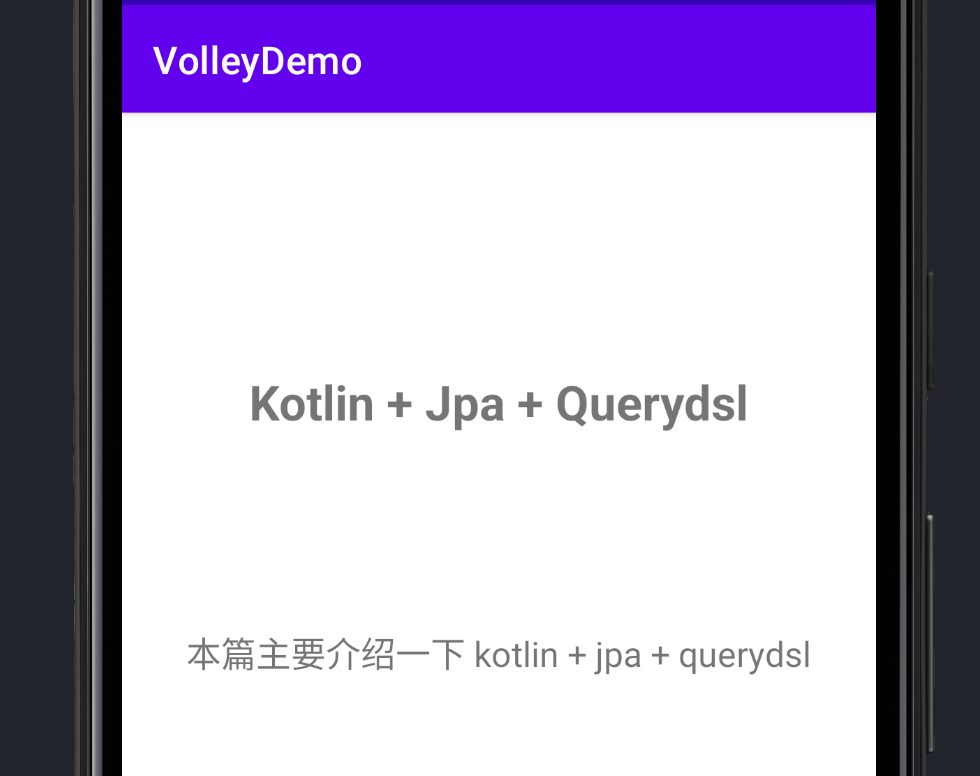
                titleTextView.text = blogInfo.data.blogTitle
                shortDescTextView.text = blogInfo.data.blogShortContent
            }, {
                Log.d(TAG, "onCreate: stringRequest error ${it.message}")
            })
        //把请求推入 queue 会自动进行异步请求
        requestQueue.add(stringRequest)
    }
效果如下..

4.2 JsonObjectRequest 构建请求
按照 JSONObject 获取数据
第二个参数 null 表示Get请求 第二个参数如果有设置 则是post方式
GET 请求
 override fun onCreate(savedInstanceState: Bundle?) {
        super.onCreate(savedInstanceState)
        setContentView(R.layout.activity_main)

        val titleTextView = findViewById<TextView>(R.id.showTitle)
        val shortDescTextView = findViewById<TextView>(R.id.showShortDesc)

        //val url = "https://weather.api.bdymkt.com/day?city=无锡"
        //
        val requestQueue = Volley.newRequestQueue(this)
        val url =
            "https://www.askajohnny.com/blogs/blogInfo/303/15"
        val postRequest = object : JsonObjectRequest(url, null,
            {
                Log.d(TAG, "volleyInitData: request success $it")
                titleTextView.text = it.getJSONObject("data").get("blogTitle") as String?
                shortDescTextView.text = it.getJSONObject("data").get("blogShortContent") as String
            }, {
                Log.d(TAG, "volleyInitData: request error ${it.message}")
            }) {
            override fun getHeaders(): MutableMap<String, String> {
                val headers = mutableMapOf<String, String>()
                headers["Accept"] = "application/json"
                headers["Content-Type"] = "application/json; charset=UTF-8"
                return headers
            }
        }
        requestQueue.add(postRequest)
    }
POST请求
此时 第二个参数设置了JSONObject() 是 post方式
        val jsonObject = JSONObject()
        jsonObject.put("pageNumber", 0)
        jsonObject.put("pageSize", 20)
        val jsonArray = JSONArray()
        jsonObject.put("ids", jsonArray)
				//此时 第二个参数设置了 是 post方式
        val postRequest = object : JsonObjectRequest(requestUrl, jsonObject, {
            Log.d(TAG, "volleyInitData: jsonstr:$it")
            val jsonStr = it.toString()
            val blogInfo = Gson().fromJson(jsonStr, BlogInfo::class.java)
            blogAdapter.list
                .addAll(blogInfo.data.content)
            blogAdapter.notifyDataSetChanged()
        }, {
            Log.d(TAG, "volleyInitData: request error ${it.message}")
        }) {
            override fun getHeaders(): MutableMap<String, String> {
                val headers = mutableMapOf<String, String>()
                headers["Accept"] = "application/json";
                headers["Content-Type"] = "application/json; charset=UTF-8";
                return headers
            }
        }
5. 扩展
5.1 添加 Header 和 Params
注意 需要object: 进行匿名内部类, 重写 getHeaders getParams getPriority 等等方法
//注意 需要object: 进行匿名内部类,  重写 getHeaders  getParams 方法
val stringRequest = object : StringRequest(Request.Method.GET,
    url, {
        val data = String(
            it.toByteArray(Charsets.ISO_8859_1),
            Charsets.UTF_8
        )
        Log.d(TAG, "onCreate: stringRequest  ${data}")
        val blogInfo = Gson().fromJson(data, BlogInfo::class.java)
        titleTextView.text = blogInfo.data.blogTitle
        shortDescTextView.text = blogInfo.data.blogShortContent
    }, {
        Log.d(TAG, "onCreate: stringRequest error ${it.message}")
    }) { //最后面 大括号 里面是匿名内部类重新方法
    override fun getHeaders(): MutableMap<String, String> {
        //返回 map map里面添加 需要放入Header的数据
        return super.getHeaders()
    }

    override fun getParams(): MutableMap<String, String>? {
        //返回 map map里面添加 需要添加的 query params
        return super.getParams()
    }
     //指定 优先级
     override fun getPriority(): Priority {
        return Priority.HIGH
     }
}
5.2 取消队列中的请求
如果想把队列中的请求取消 , 需要给请求设置一个 tag , 然后调用队列的 cancelAll 可以把指定tag的请求取消了
 //...

 stringRequest.setTag("obj");
 queue.add(objRequest);
        //取消请求
 queue.cancelAll("obj");
总结
本篇主要介绍 andriod 中 Volley的基本使用方式,它是官方开发的一个HTTP框架 简化操作 , Volley 的设计目标就是非常适合去进行数据量不大,但通信频繁的网络操作,而对于大数据量的网络操作,比如说下载文件等,Volley的表现就会非常糟糕
乱码问题参考:
https://blog.csdn.net/yangbiyao/article/details/51270839
欢迎大家访问 个人博客 Johnny小屋
欢迎关注个人公众号


