1、依赖
<!-- swagger 核心 -->
<dependency>
    <groupId>io.springfox</groupId>
    <artifactId>springfox-swagger2</artifactId>
    <version>2.8.0</version>
</dependency>
2、核心启动类的注解
@EnableSwagger2  //启用 Swagger
@EnableSwaggerBootstrapUI //启用 BootstrapUI
//经过测试 只添加 @EnableSwagger2 就可以 (如果不可以再添加试试)
3、Swagger 的 注解解释
3.1 实体上的注解
//模型数据对应的 实体注解
@ApiMode(value = "",description = "")

//模型数据对应的 属性注解
@ApiModelProperty(value = "")
3.2 controller上的注解
//写在controller上面,用于描述当前处理类支持的主要功能,包括版本说明
@Api(tags = "")

//写在目标请求处理方法上,用户描述当前方法支持的功能,属性value-方法的概述描述,属性notes-方法的详细描述
@ApiOperation(value = "",notes = "")

//参数说明注解,将接口的所有参数说明,进行归类,避免多个参数@ApiParam
@ApiImplicitParams(
    @ApiImplicitParam(required = false,name = "",value = "")
)

//响应码和响应说明
@ApiResponses({
    @ApiResponse(code = 201,message = "参数为空"),
    @ApiResponse(code = 202,message = "参数非法")
})

//参数说明注解
@RequestParam(value = "",required = false)
4、UI界面
4.1 ui 依赖
<!-- swagger ui 界面 swagger-ui.html 官方ui -->
<dependency>
    <groupId>io.springfox</groupId>
    <artifactId>springfox-swagger-ui</artifactId>
    <version>2.8.0</version>
</dependency>

<!-- swagger-bootstrap-ui包 /doc.html 推荐使用 bootstrap 的ui  -->
<dependency>
    <groupId>com.github.xiaoymin</groupId>
    <artifactId>swagger-bootstrap-ui</artifactId>
    <version>1.9.3</version>
</dependency>

<!-- 引入swagger-ui-layer包 /docs.html 了解-->
<dependency>
    <groupId>com.github.caspar-chen</groupId>
    <artifactId>swagger-ui-layer</artifactId>
    <version>1.1.3</version>
</dependency>

<!-- 引入swagger-mg-ui 包 /document.html 了解 -->
<dependency>
    <groupId>com.zyplayer</groupId>
    <artifactId>swagger-mg-ui</artifactId>
    <version>1.0.6</version>
</dependency>
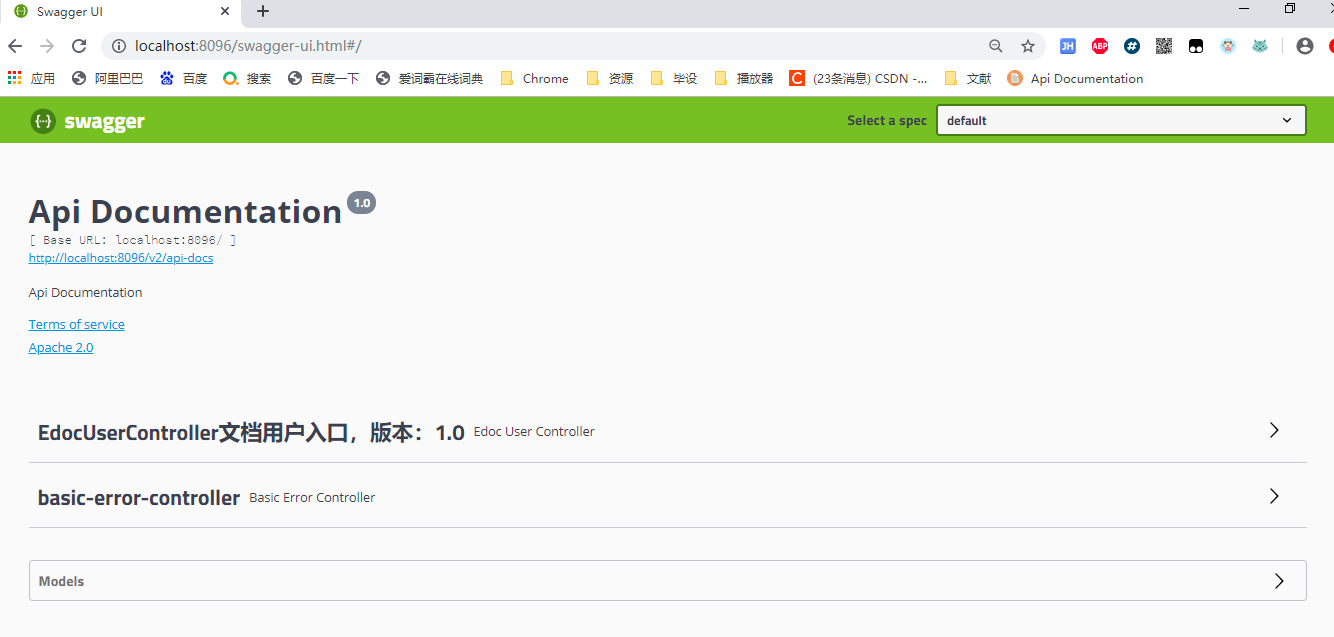
4.2 UI页面的展示
4.2.1 swagger 官方UI页面
4.2.2 bootstrap 的UI页面

hmoban主题是根据ripro二开的主题,极致后台体验,无插件,集成会员系统
自学咖网 »
SpringBoot(九) – Swagger